

Spring Training: How to De-Winterize Your RV Water System Like a Pro
![[HERO] Spring Training: How to De-Winterize Your RV Water System Like a Pro](https://cdn.marblism.com/MaAVlDnt-IE.webp)
There's nothing quite like that first warm weekend of spring when you finally get to dust off the rig and start planning your next adventure. But before you hit the road, there's one crucial task standing between you and that first perfect cup of campground coffee: de-winterizing your RV water system.
If you stored your RV properly over the winter, your plumbing is probably full of antifreeze right now. And while that pink stuff did its job protecting your pipes from freezing, you definitely don't want to be drinking it come April.
Don't worry, getting your water system spring-ready isn't complicated. Let's walk through the process step by step so you can hit the road with confidence (and clean, great-tasting water).
Step 1: Flush Out the Antifreeze
First things first, we need to get all that non-toxic antifreeze out of your system. Even though it's safe for RV plumbing, it's not exactly what you want coming out of your kitchen faucet.
Here's how to do it:
-
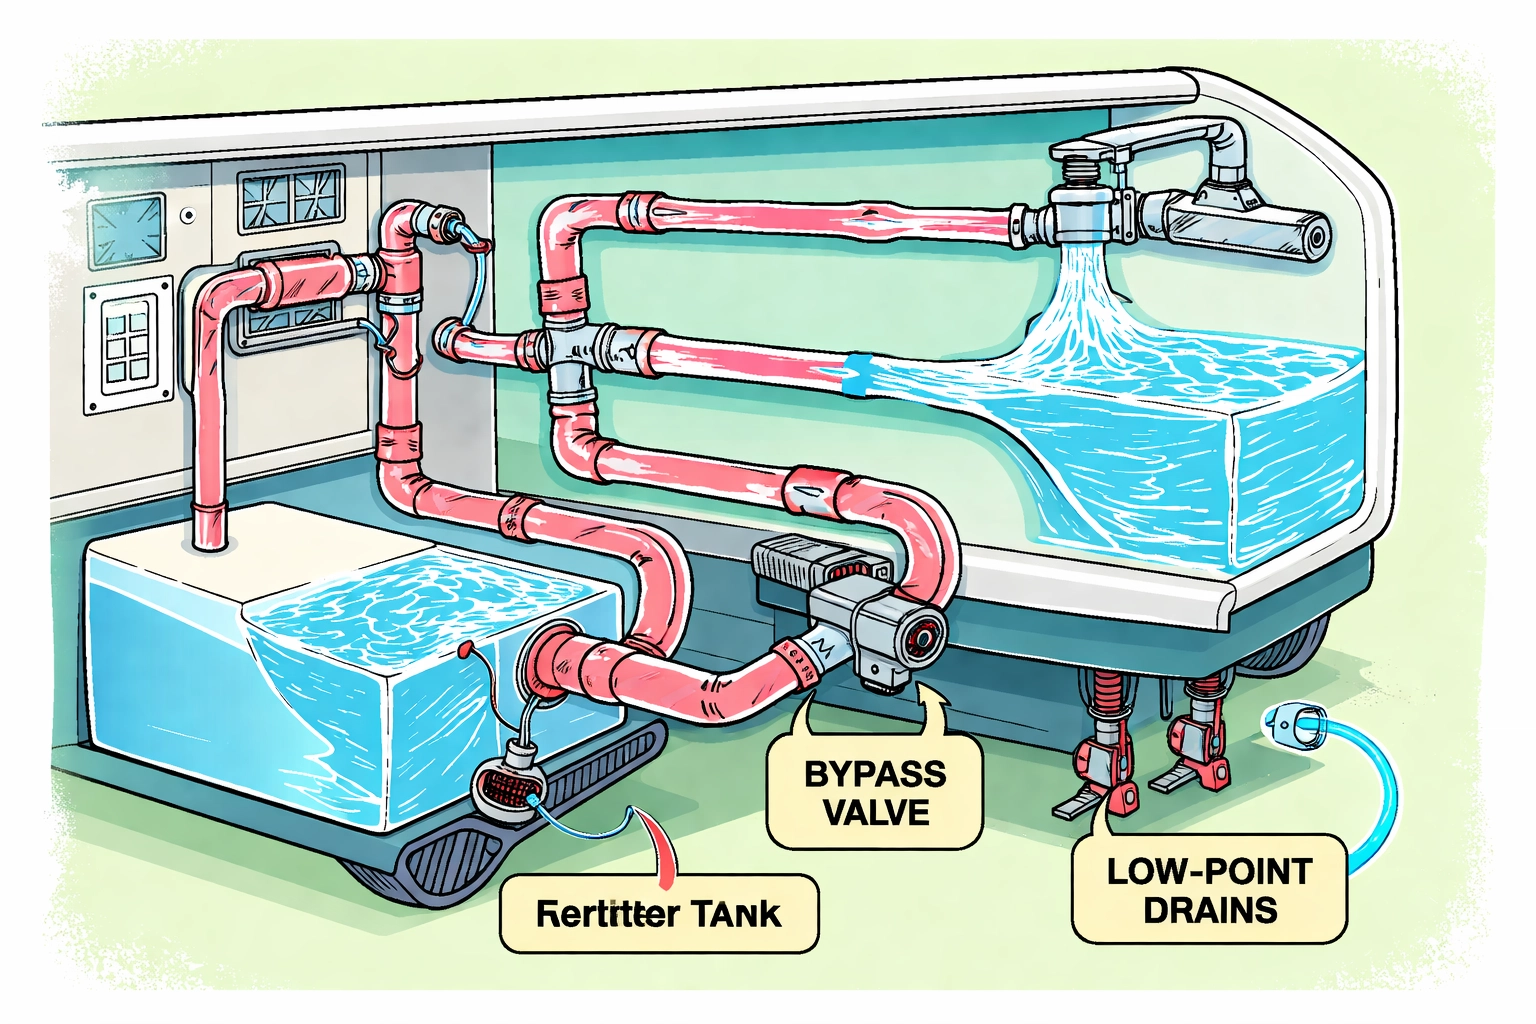
Check your water heater bypass valve. Before you start flushing, make sure the bypass valve on the back of your water heater is still engaged (the valve running parallel with the blue hose). This prevents antifreeze from entering the water heater tank during flushing.
-
Drain any antifreeze from your fresh water tank. If you added antifreeze directly to the tank during winterization, drain it completely before moving forward.
-
Add fresh water to your tank. Fill your fresh water holding tank with potable water, you'll need enough to run through your entire system.
-
Turn on your water pump and open all faucets. Start with the faucet furthest from your pump and work your way back. Run both hot and cold water at each fixture until the water runs completely clear with no pink tint.
-
Don't forget the toilet, outdoor shower, and ice maker line (if you have one). These are easy to miss but just as important.
-
Open your low point drains to flush any remaining antifreeze from the lines, then close them once the water runs clear.
Step 2: Sanitize Your Fresh Water Tank
Here's the step a lot of RVers skip, and honestly, it's one of the most important. After sitting all winter (even with antifreeze protection), your fresh water tank and plumbing can develop bacteria, biofilm, and funky tastes. A proper sanitization ensures you're starting the season with safe, clean water.
The bleach method works great:
-
Calculate your tank size and measure one-quarter cup of regular household bleach for every 15 gallons your tank holds. (For a 60-gallon tank, that's 1 cup of bleach.)
-
Dilute the bleach in a one-gallon container of water, then add this mixture to your fresh water tank through the gravity fill.
-
Fill the tank completely with fresh potable water.
-
Turn on your water pump and open every faucet in the RV, hot and cold. Run the water until you can smell bleach at each outlet. This ensures the sanitizing solution reaches every inch of your plumbing.
-
Close all faucets and let it sit for 12 hours. This gives the bleach time to kill any bacteria lurking in the system.
-
Drain the entire system and refill with fresh water. Run water through all faucets again until the bleach smell is completely gone.
Pro tip: If you're not a fan of the bleach method, there are specialized RV tank sanitizers available that work just as well without the strong chlorine smell.
Step 3: The Filter Swap (Don't Skip This One!)
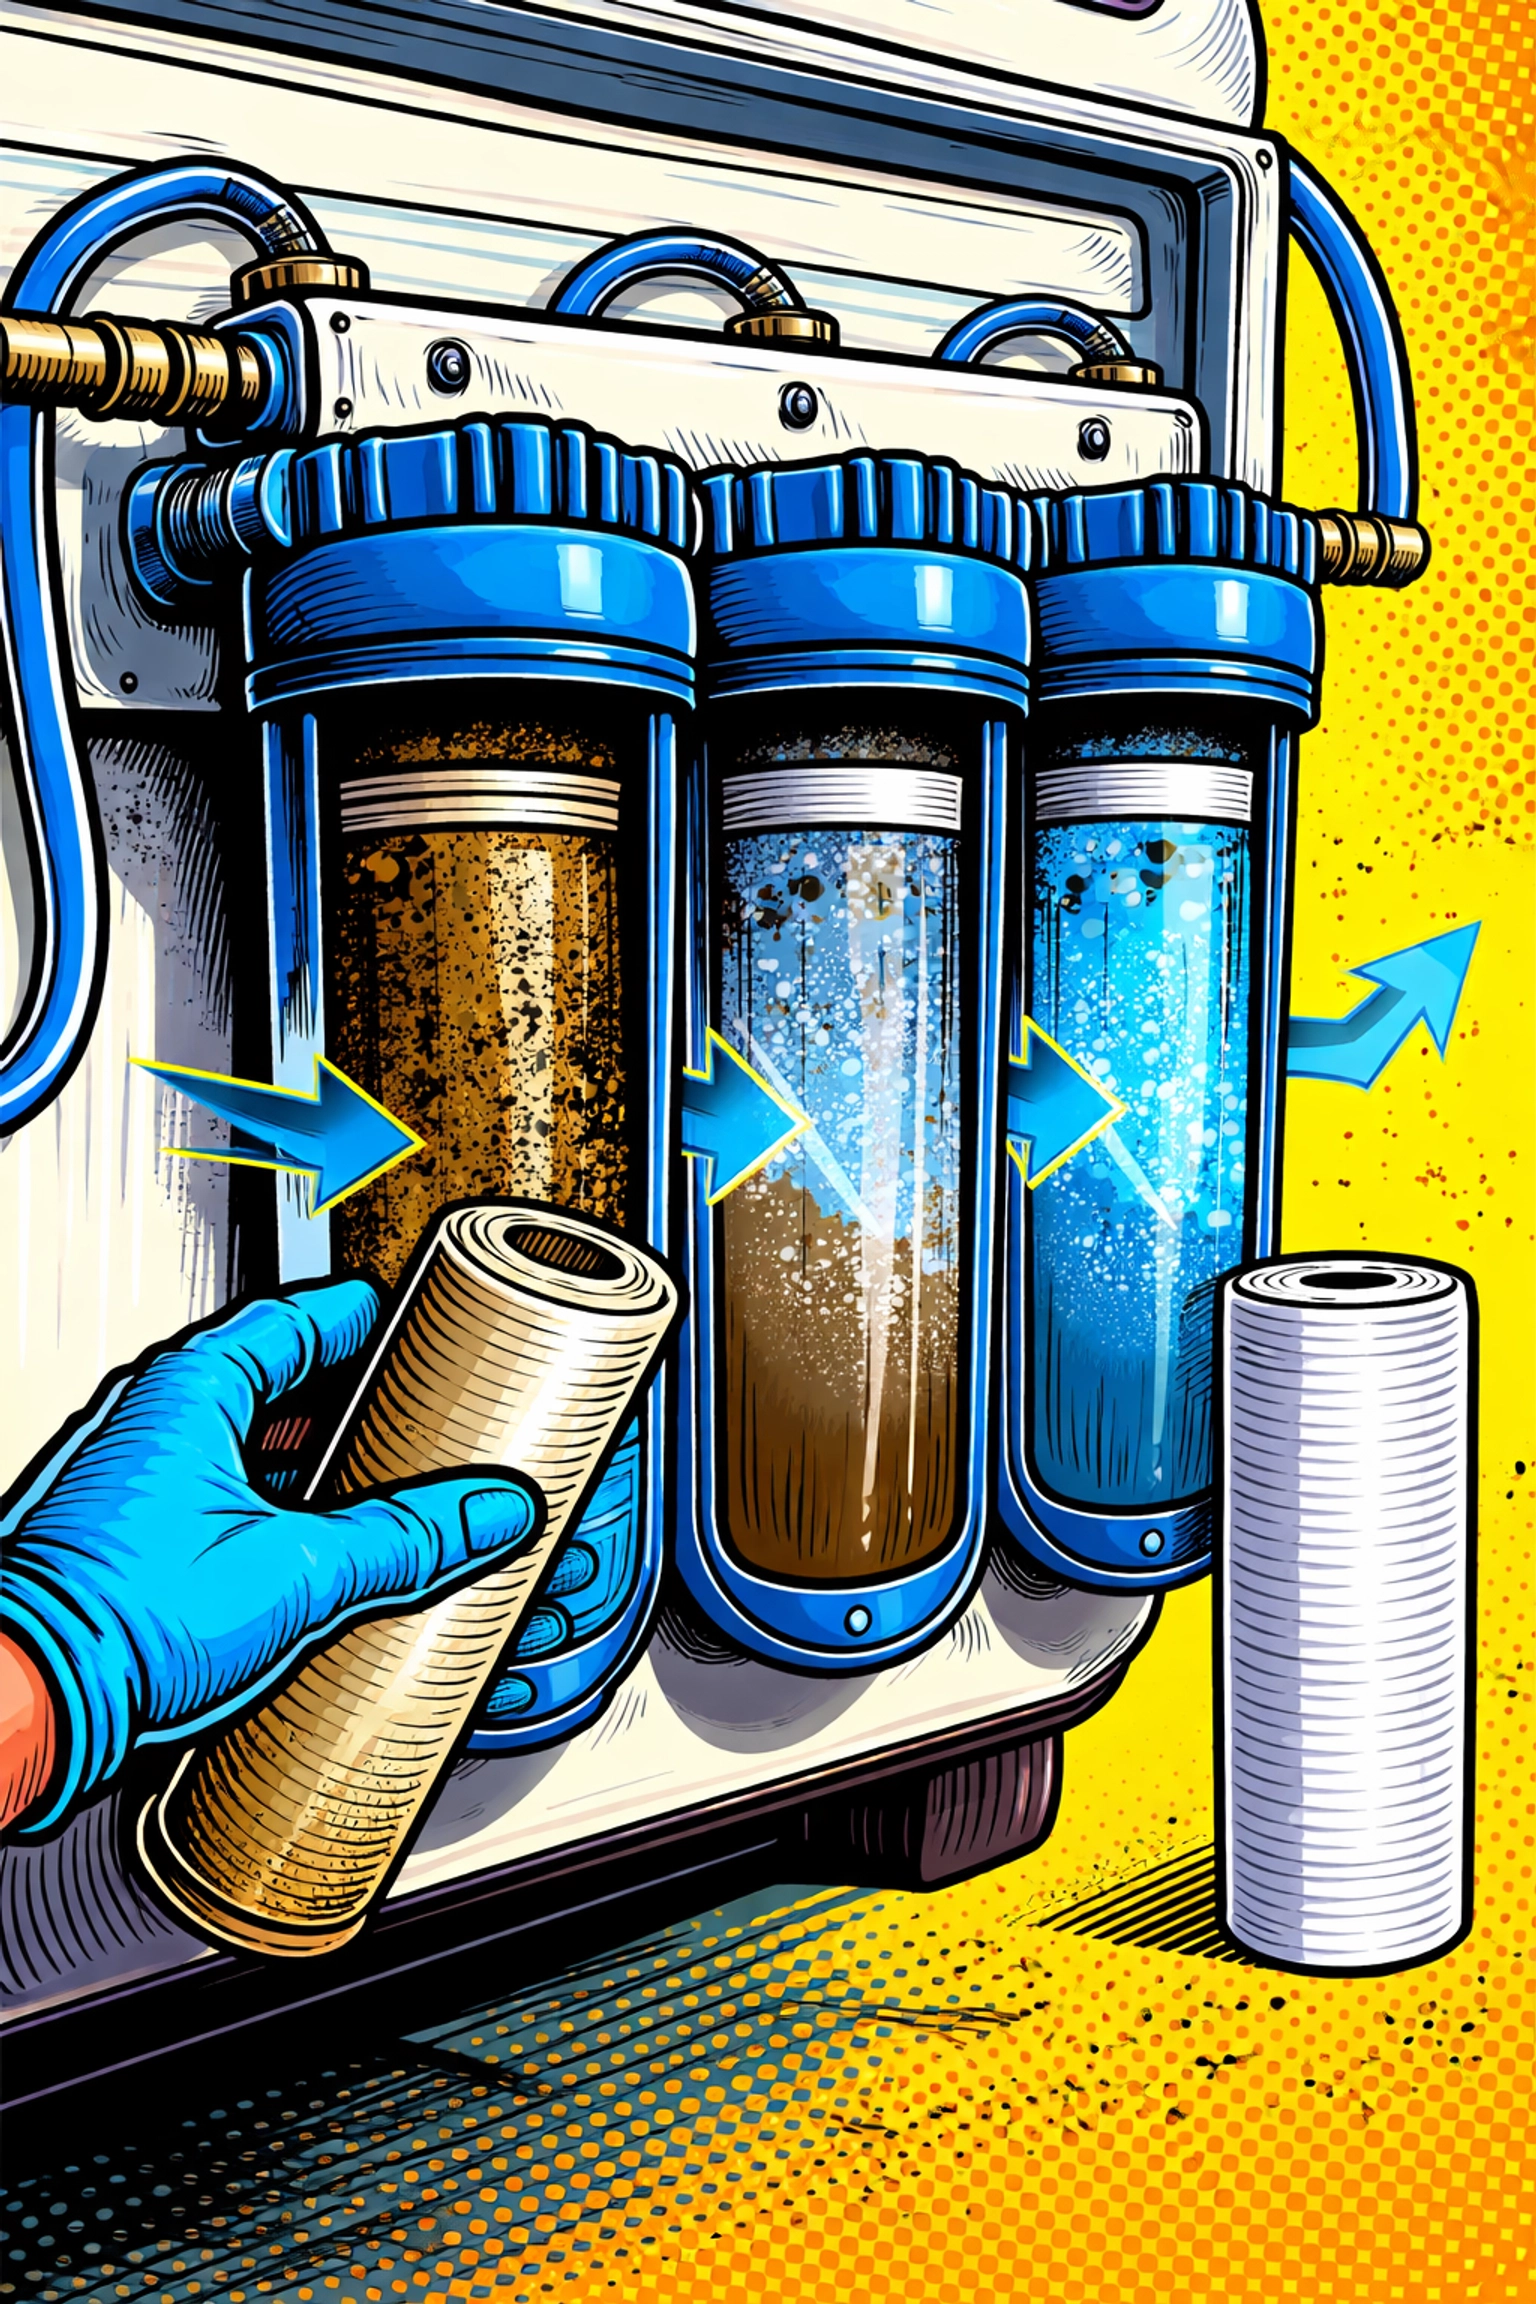
Alright, this is the big one: and honestly, it's where a lot of folks drop the ball. If you removed your rv filter cartridges before storage (which you should have), now's the time to install fresh ones. And even if you left them in place, starting the season with a new rv water filter cartridge is always a smart move.
Why does this matter so much?
Used filter cartridges that sat all winter can harbor bacteria, develop mold, or simply lose their effectiveness. Carbon filters, in particular, can become breeding grounds for microorganisms when they sit damp and unused. Starting fresh eliminates that risk entirely.
Here's what to consider when choosing your replacement cartridges:
-
Sediment filters should be your first line of defense. A quality 1-micron sediment filter catches rust, dirt, sand, and other particulates before they reach your finer filters or your faucets.
-
Carbon block filters handle the taste and odor issues: chlorine, chemicals, and that "campground water" flavor we all know too well.
-
For maximum protection, consider a multi-stage system like a triple canister water filtration system that combines sediment removal, carbon filtration, and additional purification in one setup.
-
Concerned about bacteria and viruses? The Virus Hero 0.2 Micron Water Filter offers hospital-grade filtration that removes 99.9999% of bacteria and 99.99% of viruses: perfect for boondocking or connecting to questionable water sources.
Quick installation tips:
- Always run a few gallons of water through new cartridges before use to flush out any carbon fines (that black dust you might see initially is normal and harmless).
- Check your filter housing O-rings for cracks or wear and replace them if needed.
- Hand-tighten your canisters: overtightening can crack the housings or make future changes difficult.
Step 4: The Leak Check
Winter storage can be tough on seals, gaskets, and fittings. Temperature fluctuations cause materials to expand and contract, which can lead to small leaks that weren't there in the fall.
Common leak spots to inspect:
- Water pump connections
- Water heater inlet and outlet fittings
- Under-sink plumbing connections
- Toilet water supply line
- Outdoor shower connections
- City water inlet
- Low point drain valves
How to do a proper leak check:
- Pressurize your system by connecting to a water source or running your pump.
- Walk through your RV and visually inspect every connection point.
- Run your hand along pipes and fittings: even a small drip will be obvious to the touch.
- Check underneath the RV for any water dripping from the underbelly.
Don't forget to check your water heater! Pull the pressure relief valve briefly to confirm the tank is full and functioning properly. If water comes out, you're good. Just don't turn on the heating element until you've confirmed the tank is completely full.

Step 5: Pressure Check with an Adjustable Water Regulator
Here's where that adjustable water regulator for rv really earns its keep. Campground water pressure can vary wildly: some parks run as low as 30 PSI while others push 100+ PSI. Your RV plumbing typically isn't designed to handle anything over 60 PSI.
Why adjustable regulators are worth it:
Unlike fixed regulators that output a single pressure regardless of input, an adjustable water regulator with quality components lets you dial in the exact pressure you need. This is especially useful when:
- Testing your system after de-winterization (start low and gradually increase)
- Connecting to high-pressure sources
- Troubleshooting potential leaks
Pair your regulator with a pressure gauge so you can monitor exactly what's happening in your system. During your initial spring testing, start at around 40 PSI and slowly increase while checking for leaks. This controlled approach helps you identify weak spots before they become major problems.
Bonus: Consider Your Water Softener
If you use a portable water softener, spring is also a great time to regenerate the resin before your first trip. Hard water wreaks havoc on RV plumbing, water heaters, and fixtures over time. A quality 16,000-grain portable water softener can protect your investment and make cleaning a whole lot easier.
Your Spring Checklist at a Glance
- ✅ Flush all antifreeze from the system
- ✅ Sanitize fresh water tank (12-hour bleach soak)
- ✅ Install fresh rv water filter cartridges
- ✅ Inspect all connections for leaks
- ✅ Test system pressure with an adjustable regulator
- ✅ Regenerate water softener (if applicable)
- ✅ Dump and treat holding tanks
Take your time with this process: rushing through de-winterization is how you end up with surprises 200 miles from home. A couple hours of careful prep now means worry-free water all season long.
Happy camping, and here's to clear water and open roads ahead!


